Professional China PCB Assembly Online Services
The electronics industry has seen a rapid evolution in recent years, with multilayer Printed Circuit Boards (PCBs) playing a crucial role in this transformation. Multilayer PCBs have become a staple in complex electronic circuits due to their ability to accommodate more components in a smaller space. This article aims to provide a comprehensive understanding of multilayer PCBs, their different types, and the importance of PCB stackup in their design.

A multilayer PCB is a circuit board that consists of more than two conductive copper layers (top and bottom) separated by insulating layers. These copper layers are laminated together with heat and adhesive to form a compact and robust circuit board. The layers in a multilayer PCB are interconnected using plated through holes or vias, enabling complex circuit designs.
Multilayer PCBs offer several advantages over single-layer and double-layer PCBs. They provide higher assembly density, better noise immunity, and easier incorporation of controlled impedance features. Additionally, they allow for a more compact design, which is crucial in modern electronics where space is often at a premium.
2-Layer PCBs
A 2-layer PCB consists of a top and bottom conductive layer, with components mounted on both sides if required. The two layers are separated by an insulating material, and electrical connections are made through vias. 2-layer PCBs are common in simple electronic devices.
4-Layer PCBs
A 4-layer PCB is more complex, with two additional conductive layers sandwiched between the top and bottom layers. These inner layers typically serve as power planes, providing a stable voltage level and ground connection to the circuit components. This configuration reduces electromagnetic interference (EMI), making 4-layer PCBs ideal for more complex circuits.
6-Layer PCBs
A 6-layer PCB adds another pair of conductive layers to the 4-layer configuration. These extra layers can be used for additional signal routing or power planes, offering even greater design flexibility. 6-layer PCBs are commonly found in high-density designs like computer motherboards and servers.
PCB stackup refers to the arrangement of copper layers and insulating layers in a multilayer PCB. It plays a crucial role in determining the performance of the PCB, affecting signal integrity, EMI, and power distribution.
A well-designed PCB stackup can minimize signal interference and crosstalk, enhance signal quality, and ensure stable power and ground planes. It can also help manage thermal issues, which are often a concern in high-density designs.
When designing a PCB stackup, factors to consider include the number of layers, the thickness of each layer, the type of insulating material used, and the arrangement of signal and power layers. The optimal stackup can vary depending on the specific requirements of the circuit and the constraints of the application.
In the early stages of electronics design, prototyping is a critical step. It allows designers to test their designs and make necessary adjustments before moving on to full-scale manufacturing. For multilayer PCBs, specialized prototyping machines are used.
Multilayer PCB prototyping machines use advanced technologies to accurately replicate the design onto the PCB layers. These machines use a combination of milling and drilling to create the necessary traces and holes on the PCB layers. Some advanced machines also offer laser etching capabilities, which can create more precise and intricate designs.
These machines can handle a range of materials, including FR4, aluminum, and copper, and can accommodate different PCB thicknesses. With computer-aided design (CAD) software, designers can quickly and easily create prototypes of their multilayer PCB designs.
The manufacturing process of multilayer PCBs is a complex one, involving several stages:
1. Design: The process begins with the design of the PCB using CAD software. The design includes the layout of the components and the routing of the electrical connections.
2. Layer Formation: Each layer of the PCB is prepared separately. This involves coating a substrate material with a layer of copper, which is then etched away to leave the desired pattern of traces.
3. Stacking and Bonding: The individual layers are then stacked together in the correct order. An adhesive is used to bond the layers together, and the stack is heated to cure the adhesive and form a solid multilayer board.
4. Drilling and Plating: Holes are drilled in the PCB to allow for the insertion of components and to create vias that connect the different layers. The holes are then plated with copper to ensure good electrical conductivity.
5. Solder Mask and Silkscreen: A solder mask is applied to the PCB to protect the copper traces and prevent solder bridges. A silkscreen layer is also added to provide labels and other useful information.
6. Testing: The final step is to test the PCB to ensure it functions as intended.
While professional manufacturing is required for high-quality, commercial-grade PCBs, it's possible to make a simple multilayer PCB at home. This can be a fun and educational project for electronics enthusiasts.
To make a DIY multilayer PCB, you'll need some copper-clad boards, a way to etch your designs onto the copper (such as a chemical etchant or a CNC machine), and a method for bonding the layers together (such as an iron or a laminator). You'll also need a drill to create holes for the components and vias.
Remember, safety is paramount when making PCBs at home. Always work in a well-ventilated area, wear protective clothing, and follow all safety instructions.
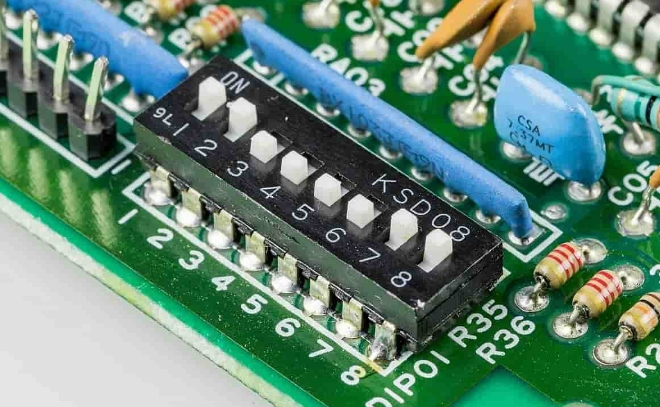
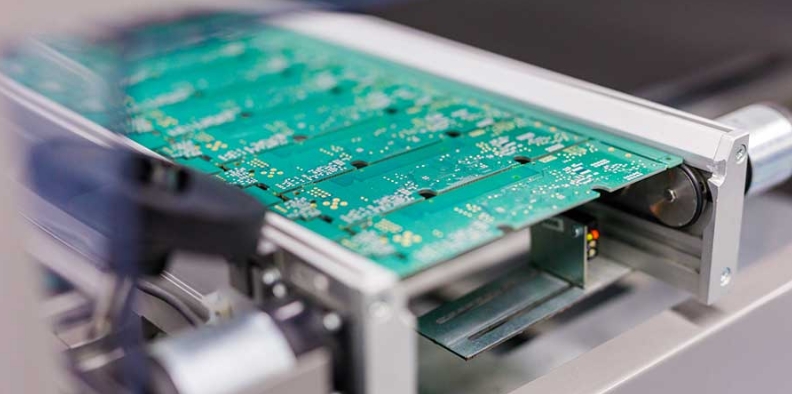
Multilayer PCB assembly is a meticulous process that requires precision and expertise. It involves soldering components onto a multilayer PCB, which can have anywhere from four to twelve or more layers of circuitry stacked and pressed together. The complexity of the assembly process increases with the number of layers, as each layer may have its own distinct function and components.
The assembly process typically begins with the application of solder paste to the PCB. This is usually done using a stencil to ensure that the paste is only applied to the intended areas. Next, the components are placed onto the PCB using a pick-and-place machine. The PCB is then passed through a reflow oven, which melts the solder paste and forms a solid electrical and mechanical connection between the components and the PCB.
The assembly process must be carried out with extreme care to avoid issues such as solder bridging, tombstoning, and insufficient wetting. These can lead to faults in the final product and may require rework or even scrapping of the PCB.
When it comes to multilayer PCB assembly, JLCPCB Assembly stands out as a reliable choice. Offering a combination of advanced technology, skilled technicians, and rigorous quality control, JLCPCB Assembly can handle the complexity and precision required for multilayer PCB assembly.
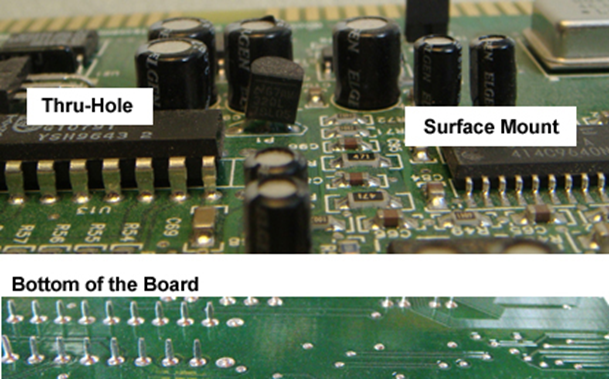
JLCPCB Assembly offers both Surface Mount Technology (SMT) and Through-Hole Technology (THT) assembly services. Their capabilities include multi-zone reflow ovens for high-quality soldering, automatic optical inspection (AOI) for defect detection, and X-ray inspection for verifying the quality of hidden or internal solder joints.
With a focus on customer satisfaction, JLCPCB Assembly ensures that each PCB is assembled to the highest standards, helping electronics manufacturers bring reliable and high-quality products to market.
The terms Circuit Card Assembly (CCA) and PCB are often used interchangeably in the electronics industry. However, there are some differences between the two.
A PCB refers to a board that has been etched with conductive pathways, tracks, or signal traces. It serves as the backbone of most electronic devices, providing the physical platform for mounting and interconnecting components.
On the other hand, CCA refers to a complete assembly that includes a PCB along with all the components mounted on it. In other words, a CCA is a fully populated PCB, ready for use in an electronic device.
In essence, the PCB is the starting point, and the CCA is the end product of the assembly process. Understanding this distinction is important when discussing the assembly and manufacturing processes in electronics.
Altium Designer is a powerful and comprehensive tool for PCB design, offering robust features for multilayer design. Here's a step-by-step guide to designing a multilayer PCB with Altium:
1. Start a New Project: Open Altium and start a new PCB project. Add a new PCB to the project.
2. Set Layer Stack Manager: Go to "Design" > "Layer Stack Manager" to set up the layers for your PCB. You can add or remove layers, and adjust their thickness and materials as needed.
3. Import Components: Import the components you'll be using in your design. You can do this by adding libraries or using the integrated libraries in Altium.
4. Place Components and Route Traces: Place your components on the board and route the traces. Altium's powerful routing tools can automatically route complex, multilayer designs.
5. Design Rule Check: Use the Design Rule Check (DRC) to verify your design. The DRC can check for a variety of issues, such as clearance violations and unconnected nets.
6. Generate Outputs: Once your design is complete and verified, you can generate the necessary outputs for manufacturing.
KiCad is another popular choice for PCB design, particularly for hobbyists and smaller companies due to its open-source nature. Here's how you can design a multilayer PCB with KiCad:
1. Create a New Project: Open KiCad and create a new project. Add a new PCB to the project.
2. Configure Layers: Go to "Design Rules" > "Layer Setup" to configure your PCB layers. You can set the number of layers and their order here.
3. Add Components: Add the components to your design using KiCad's component libraries.
4. Place Components and Route Traces: Place the components on your board and route the traces. KiCad also offers automatic routing tools to help with complex designs.
5. Design Rule Check: Run the DRC to check for any errors or issues in your design.
6. Generate Fabrication Files: Once your design is complete and error-free, you can generate the fabrication files for manufacturing.
Designing multilayer PCBs is a complex task that requires careful planning and consideration. Here are some key factors to consider:
1. Layer Stackup: The arrangement of the layers in your PCB can have a significant impact on its performance. You'll need to carefully plan your stackup to ensure good signal integrity and minimize electromagnetic interference.
2. Routing: Routing becomes more complex with more layers. You'll need to carefully plan your routing to ensure that all components are correctly connected and that the signal paths are as short and direct as possible.
3. Thermal Management: Multilayer PCBs can generate more heat than single-layer or double-layer PCBs. You'll need to consider thermal management strategies, such as using thermal vias and heat sinks, to keep your PCB cool.
In conclusion, mastering multilayer PCB design with Altium and KiCad can open up new possibilities for your electronics designs. With careful planning and consideration, you can create complex, high-performance devices that are ready for the demands of today's technology landscape.