Professional China PCB Assembly Online Services
If you are interested in creating your own custom printed circuit boards (PCBs), you might be wondering how to get started and what are the best practices to follow. PCB design is a complex and rewarding process that requires some knowledge, skills and tools. In this article, we will share some tips and strategies to help you explore the possibilities of custom PCB design and make your projects more successful.

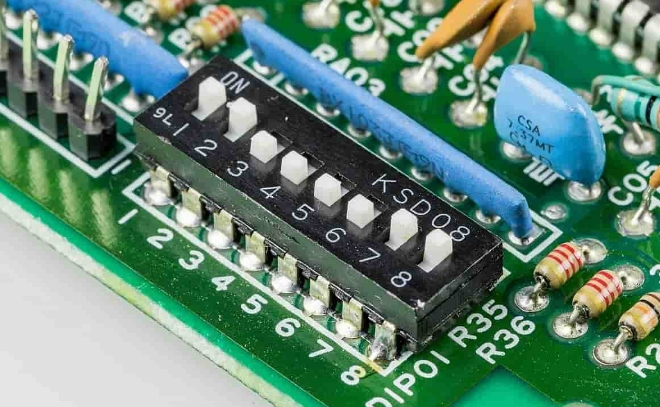
A custom PCB is a circuit board that is designed and manufactured according to your specific requirements and specifications. Unlike standard or off-the-shelf PCBs, which are mass-produced and have fixed features, custom PCBs allow you to tailor the board to your needs and preferences. For example, you can choose the size, shape, layout, components, materials, colors and finishes of your custom PCB.
There are many benefits of using a custom PCB for your projects, such as:
- You can optimize the performance, functionality and reliability of your circuit by choosing the best components and layout for your application.
- You can reduce the size and weight of your circuit by eliminating unnecessary or redundant parts and using compact or flexible PCBs.
- You can enhance the aesthetics and user experience of your product by adding features such as LEDs, buttons, displays, sensors or connectors.
- You can save time and money by avoiding the need to modify or adapt standard PCBs to fit your needs.
- You can express your creativity and innovation by designing unique and original PCBs that reflect your vision and style.
The process of designing a custom PCB involves several steps, such as:
- Define the requirements and specifications of your circuit, such as the function, power, input/output, components, size, shape and budget.
- Choose a suitable PCB design software that allows you to create, edit and simulate your circuit. There are many options available, ranging from free online tools to professional software packages.
- Draw the schematic diagram of your circuit using the symbols and connections of the components. The schematic diagram represents the logical structure and behavior of your circuit.
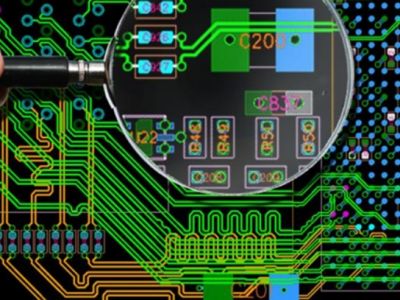
- Convert the schematic diagram into a PCB layout using the software's autorouter or manual routing features. The PCB layout represents the physical arrangement and placement of the components on the board.
- Check the design rules and errors using the software's verification tools. The design rules are the guidelines and constraints that ensure the manufacturability and functionality of your PCB. The errors are the violations or inconsistencies that need to be fixed or corrected.
- Generate the output files for fabrication using the software's export tools. The output files are the documents that contain the information and instructions for producing your PCB. The most common output file format is Gerber, which is a standard format accepted by most PCB manufacturers.
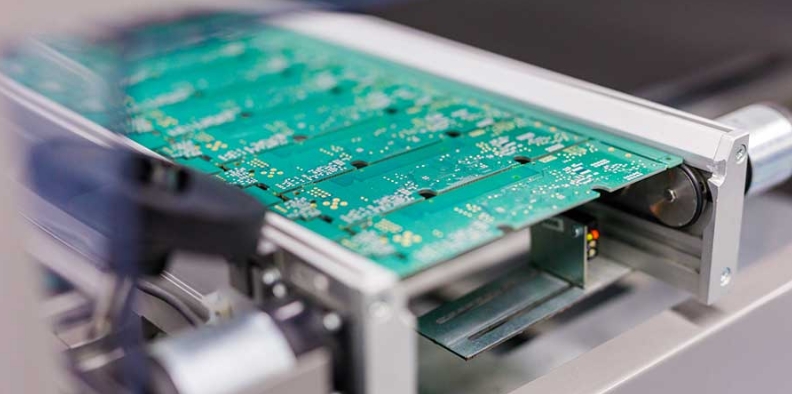
The process of manufacturing a custom PCB involves several steps, such as:
- Choose a reliable and reputable PCB manufacturer that can meet your quality, quantity and delivery expectations. You can compare different manufacturers based on their services, prices, reviews and ratings.
- Upload or send your output files to the manufacturer using their online platform or email. You can also specify any additional details or requirements for your order, such as the quantity, materials, colors, finishes or testing options.
- Review and confirm your order using the manufacturer's confirmation tools. You can check the preview or prototype of your PCB before proceeding with the production.
- Wait for your order to be processed and shipped by the manufacturer. The processing time depends on the complexity and quantity of your order, as well as the availability of materials and equipment. The shipping time depends on the location and method of delivery.
- Receive and test your custom PCBs using your own tools or equipment. You can verify if they match your design specifications and expectations, as well as if they function properly.
If you are a hobbyist, a student, or a professional who wants to design your own printed circuit boards (PCBs), you might be wondering how to get started and what tools and techniques you need. PCB design is a complex and rewarding process that requires creativity, skill, and attention to detail. In this article, we will share some tips and strategies for custom PCB design that can help you achieve your goals and avoid common pitfalls.
1. Choose the right software. There are many PCB design software options available, ranging from free and open-source to expensive and proprietary. Depending on your budget, experience level, and project requirements, you should choose the software that suits your needs and preferences. Some popular PCB design software are KiCad, Eagle, Altium Designer, OrCAD, and CircuitMaker. You should look for software that has a user-friendly interface, a large component library, a powerful schematic editor, a reliable layout editor, and a comprehensive error checker.
2. Plan your circuit. Before you start drawing your schematic, you should have a clear idea of what your circuit does, what components it needs, and how they are connected. You should also consider the power supply, the input and output signals, the communication protocols, and the safety features of your circuit. You can use online calculators, datasheets, reference designs, and tutorials to help you plan your circuit.
3. Draw your schematic. A schematic is a graphical representation of your circuit that shows the components and their connections using symbols and wires. A schematic is essential for documenting your design, testing your circuit, and generating your layout. You should use the schematic editor of your PCB design software to draw your schematic following some best practices:
- Use a grid to align your components and wires.
- Use labels, names, values, and comments to identify your components and signals.
- Use buses, ports, and hierarchical blocks to organize your schematic into logical sections.
- Use standard symbols and conventions to represent your components and connections.
- Use net classes and design rules to define the electrical characteristics of your signals.
- Use ERC (electrical rule check) to detect any errors or inconsistencies in your schematic.
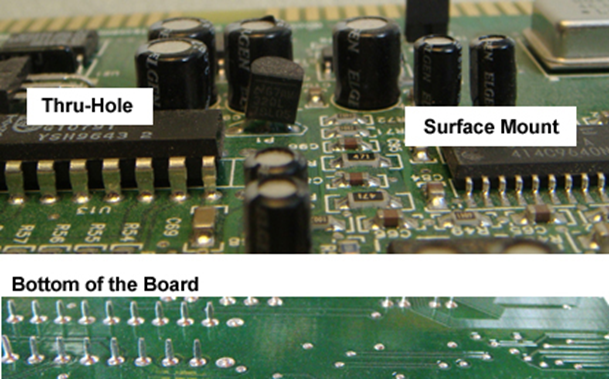
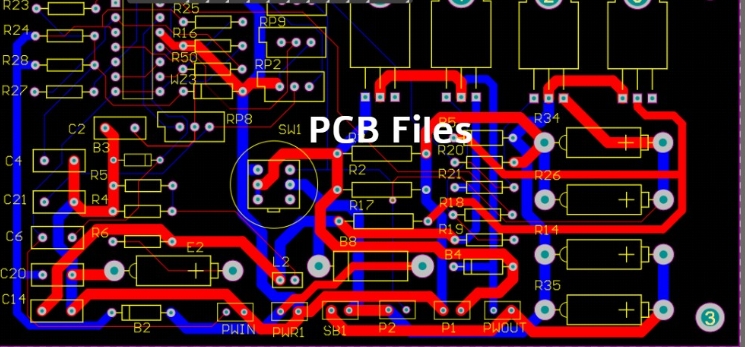
4. Generate your layout. A layout is a physical representation of your circuit that shows the traces (copper wires) and pads (contact points) that connect your components on a PCB. A layout is crucial for manufacturing your PCB and testing its performance. You should use the layout editor of your PCB design software to generate your layout following some best practices:
- Use DRC (design rule check) to verify that your layout meets the specifications of your manufacturer and complies with the electrical rules of your schematic.
- Use autorouter or manual routing to create the traces between the pads according to the netlist (a list of connections) generated from your schematic.
- Use vias (holes) to connect traces on different layers of your PCB.
- Use ground planes (large copper areas) to provide a common reference voltage for your circuit and reduce noise and interference.
- Use copper pours (filled areas) to increase the current carrying capacity of your traces and improve the thermal performance of your PCB.
- Use silkscreen (text and graphics) to label your components and provide instructions for assembly and testing.
5. Test and debug your PCB. After you finish your layout, you should test and debug your PCB before sending it to fabrication. You can use simulation tools, breadboards, prototypes, multimeters, oscilloscopes, logic analyzers, and other instruments to verify that your PCB works as intended and meets your specifications. You should also check for any errors or defects in your PCB such as shorts, opens, solder bridges, cold joints, missing components, or incorrect orientation.
Conclusion
PCB design is a fun and challenging activity that can help you create custom electronic devices for various applications. By following these tips and strategies for custom PCB design, you can improve your skills and achieve better results. Remember to always check your work carefully before sending it to fabrication and enjoy the process of learning by doing.