Professional China PCB Assembly Online Services
Introduction to Flex PCB Manufacturing
Flexible printed circuit boards (Flex PCBs) are an essential component in many electronic devices. They offer advantages over traditional rigid PCBs, such as improved flexibility, reduced weight, and the ability to bend or fold to fit into tight spaces. This comprehensive guide will walk you through the flex PCB manufacturing process, from design to assembly, providing you with a detailed understanding of each step involved.

Step 1: Designing the Flex PCB
The first step in the flex PCB manufacturing process is designing the circuit layout. This is typically done using computer-aided design (CAD) software. During the design phase, you need to consider the circuit's electrical requirements, mechanical constraints, and the desired flexibility of the board.
When designing a flex PCB, it's important to determine the number of layers needed, the thickness of the base material (substrate), and the type of flexible material to be used. You should also consider the placement and routing of components, ensuring they can withstand the mechanical stress and bending of the board.
Step 2: Material Selection
Choosing the right materials is crucial for the manufacturing of flex PCBs. The selection depends on the desired mechanical properties, flexibility, and electrical performance. The main materials used in flex PCB manufacturing include:
1.Substrate/Base Material: The base material provides the mechanical support for the circuit. Commonly used substrates include polyimide (PI) and polyester (PET) films due to their excellent flexibility and heat resistance.
2.Conductive Layers: Copper is the most widely used metal for the conductive layers on flex PCBs due to its excellent conductivity. The copper is typically plated onto the substrate using an electroless or electrolytic process.
3.Coverlay: Coverlay is a protective layer applied over the conductive traces to insulate them and provide mechanical protection. It is usually made of a flexible solder mask or a polyimide film.
4.Adhesive: Adhesive layers are used to bond multiple layers together. They provide structural integrity to the flex PCB.
Step 3: Manufacturing Processes
Once the design and materials are finalized, the manufacturing process begins. Flex PCBs are typically manufactured using a combination of traditional PCB fabrication processes and specialized flex PCB techniques. The key manufacturing processes involved are:
1.Imaging: The circuit pattern is transferred onto the copper-clad substrate using photolithography techniques. A photosensitive material called a photoresist is applied to the copper, and the circuit pattern is exposed to UV light through a photomask. The exposed areas are then chemically etched, leaving behind the desired circuit traces.
2.Lamination: In this step, multiple layers of flexible materials, such as polyimide film and adhesive, are laminated together using heat and pressure. The layers are aligned accurately to ensure proper registration of the circuit patterns.
3.Drilling: Precision drilling is performed to create holes for component mounting and electrical connections. Specialized drilling equipment is used to drill through the flexible substrate without damaging it.
4.Plating: Copper plating is applied to the drilled holes and circuit traces to improve conductivity and ensure proper interconnection. The plating process involves electroless or electrolytic deposition of copper onto the exposed surfaces.
5.Coverlay Application: A coverlay is applied to the circuit surface to protect the conductive traces. The coverlay material is typically a flexible solder mask or a polyimide film with openings for component pads and vias.
6.Surface Finish: OSP (Organic Solderability Preservative).
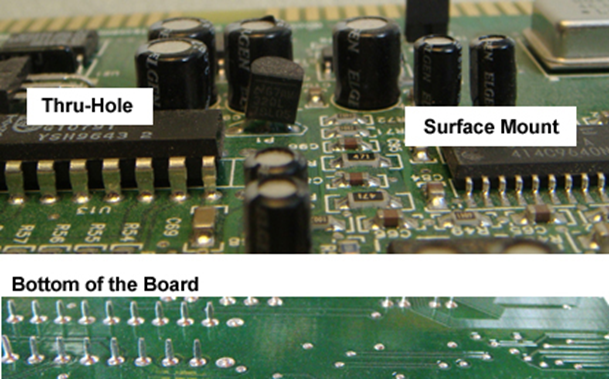
7.Component Assembly: The components are mounted onto the flex PCB using surface mount technology (SMT) or through-hole technology (THT). SMT components are soldered directly onto the surface of the board, while THT components have leads that pass through drilled holes and are soldered on the opposite side of the board.
8.Testing: Once the components are soldered, the flex PCB undergoes various tests to ensure its functionality and reliability. These tests include electrical continuity testing, impedance testing, and functional testing to verify the circuit's performance.
9.Flexibility Testing: Flex PCBs are subjected to mechanical stress tests to assess their flexibility and durability. The boards may be bent, folded, or twisted to evaluate their performance under different conditions.
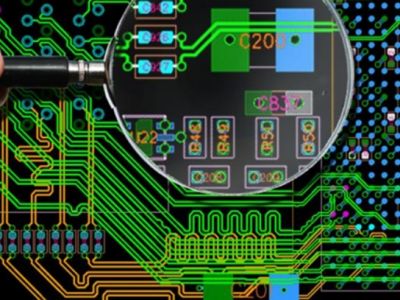
10.Inspection and Quality Control: A thorough inspection is conducted to check for any manufacturing defects, such as open circuits, short circuits, or soldering issues. Quality control measures are implemented to ensure that the flex PCB meets the required standards and specifications.
11.Finalization: After passing all tests and inspections, the flex PCB is cleaned, and any protective films or coatings are applied as necessary. The boards are then carefully packaged to prevent damage during transportation.
12.Post-Processing: In some cases, additional post-processing steps may be required, such as laser cutting or scoring the flex PCB to create specific shapes or sizes.
Conclusion:
The manufacturing process for flex PCBs involves careful design considerations, material selection, and a combination of specialized manufacturing techniques. By following the comprehensive guide outlined above, you can gain a better understanding of the flex PCB manufacturing process, from design to assembly. Flex PCBs offer unique advantages in terms of flexibility and space-saving, making them a preferred choice for various applications in the electronics industry.
Get more knowledge about Flex PCB Manufacturing Process please refer to Rigaopcb:https://www.rigaopcb.com/