Professional China PCB Assembly Online Services
Manufacturing a PCB (Printed Circuit Board) involves several steps to transform the design into a physical board. Here's a step-by-step guide to PCB manufacturing:

PCB Design Preparation: Prepare the design files in the required format. This includes the Gerber files, which contain the PCB layout, copper traces, and component placements. Other design files, such as the drill file (containing information about the holes), may also be needed.
Panelization: If multiple PCBs are needed, panelize the design. Panelization involves arranging multiple copies of the PCB design in a panel layout to optimize manufacturing efficiency and reduce costs. This step is particularly important for mass production.
Material Selection: Choose the appropriate PCB substrate material based on your design requirements. Common materials include FR-4 (a type of fiberglass-reinforced epoxy laminate), flexible materials like polyimide, or specialized materials for high-frequency or high-temperature applications.
Material Cutting: Cut the base material into the required size and shape. This can be done using a CNC machine or a cutting tool, ensuring that the dimensions match the design specifications.
Cleaning and Surface Preparation: Clean the base material to remove any dirt, grease, or oxidation. This step ensures proper adhesion of the copper layers and promotes better solderability. Surface preparation techniques may vary depending on the specific material being used.
Copper Cladding: Apply a thin layer of copper to the substrate using various methods such as electroplating or lamination. This copper layer will serve as the conductive traces and pads on the PCB. The thickness of the copper layer is determined by the design requirements and manufacturing standards.
Imaging: Transfer the PCB design from the Gerber files onto the copper-clad substrate. This is typically done through a process called photoresist imaging, where a photosensitive material (photoresist) is applied to the copper surface, and the Gerber data is used to expose the photoresist to UV light. This step defines the copper traces and pads.
Etching: Remove the unwanted copper from the PCB surface using a chemical etching process. The exposed copper that is not protected by the photoresist is dissolved, leaving behind the desired copper traces and pads. Etching is usually done using an etchant solution such as ferric chloride or ammonium persulfate.
Drilling: Drill holes into the PCB to create vias and component mounting holes. These holes are typically made using automated drilling machines with high precision. The drill file from the design is used as a guide for drilling the correct hole locations and sizes.
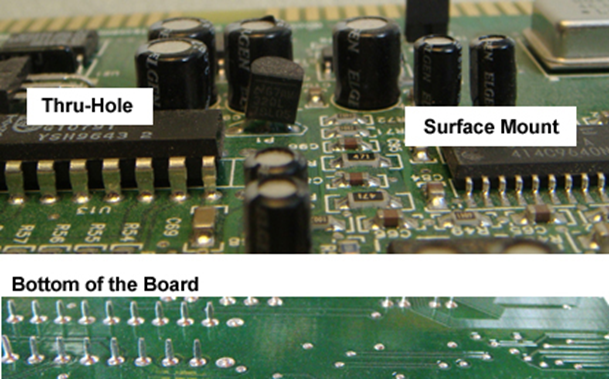
Plating: Plate the drilled holes with a conductive material, typically copper, to establish electrical connections between different layers of the PCB. This process is called through-hole plating or via plating and is often done using electroplating techniques.
Solder Mask Application: Apply a solder mask over the entire PCB surface, leaving only the desired copper traces and pads exposed. The solder mask protects the PCB from environmental factors, prevents solder bridges during assembly, and improves the overall appearance of the board. It is typically applied using a screen-printing process.
Silkscreen Printing: Apply the silkscreen layer on the PCB surface. This layer includes component reference designators, labels, logos, and other markings to aid in component placement, assembly, and identification. Silkscreen printing is usually done using a screen-printing technique.
Surface Finish: Apply a surface finish to protect the exposed copper surfaces and enhance solderability. Common surface finishes include HASL (Hot Air Solder Leveling), ENIG (Electroless Nickel Immersion Gold), OSP (Organic Solderability Preservative), and immersion tin or silver. The choice
In summary, the PCB manufacturing process involves steps such as design preparation, material selection, copper cladding, imaging, etching, drilling, plating, solder mask application, silkscreen printing, and surface finishing. These steps collectively transform the design into a physical PCB board.
Get more knowledge about How do you manufacture a PCB step by step please refer to Rigaopcb:https://www.rigaopcb.com/